TravelPerk & AWS Single Sign On (SSO)
- nubeGo
- Mar 30, 2020
- 3 min read

Fernando Hönig, CEO and Founder of nubeGo discusses the adoption of TravelPerk by our trainers and offers a step by step guide to the integration of TravelPerk with AWS SSO.
As Training and Consultancy are our core pillars at nubeGo, we needed to ensure our travel management was a great experience for our trainers. We always want to provide as much freedom as possible when it comes to selecting flights, hotels or train journeys. Allowing our staff to book themselves within a travel policy is paramount for us, as it really reduces a lot of admin burden.
We found TravelPerk, tried it for a month and found it really useful as it was exactly what we needed to outsource 100% of our travel management. We quickly moved to the Premium subscription due to adding corporate rate discounts, a concierge service and also a simple mechanism to add new members to the platform.
Another core pillar here is Managed Cloud Services and as an Advanced Consulting Partner of Amazon Web Services, our teams are used to working with a Single Sign On (SSO) system in order to support our customer’s environments. Our company uses AWS SSO which makes it easy to centrally manage access to multiple AWS accounts and business applications and provide users with single sign-on access to all their assigned accounts and applications from one place.
When we contacted TravelPerk to enable SSO, AWS SSO wasn’t part of their supported integrations, but after a great customer service interaction and teamwork between both organisations, we managed to build this integration successfully.
AWS SSO Configuration

The first thing you need to do is configure TravelPerk as a Cloud Application in AWS SSO:
Go to your AWS console and select AWS SSO. If you haven’t configured AWS SSO yet, nubeGo can help in setting this up.
When you create this new cloud application, you will be presented with a screen similar to the one below. At this point, the most important part is to download the AWS SSO SAML metadata and send it to the TravelPerk Support Team.

At the bottom of this page, you will find the below items. Momentarily until TravelPerk gives us the right values, put an example url like https://yourdomain.com
Application ACS URL
Application SAML audience
Now it’s time to configure the Attribute mappings. Click on the next tab and fill out as indicated below (case sensitive):

TravelPerk SSO Configuration
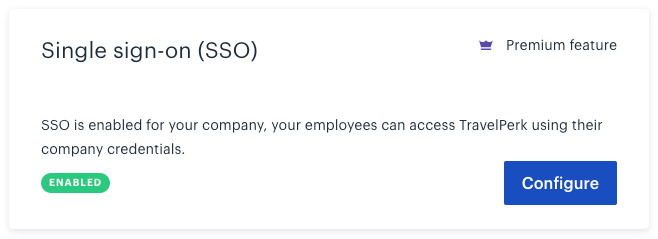
You need to ask TravelPerk to enable SSO for your account. They will ask you to provide the SSO SAML metadata file (you have this when configured AWS SSO). Once they enable it, you will find the following in the Integrations tab under Company Settings. Click Configure, you need to Enable SSO. For now, do not click SSO Only, as we need to configure it on the other end.

Finally, allow user creation, so we don’t need to manually create each user. If you require a user to have an admin role, once created, you need to change the role for that particular user.
Now you need to go back to AWS SSO and fill out the following with the information provided by TravelPerk:
Application ACS URL
Application SAML audience
Once this is done, add a user in AWS SSO to enable access via SSO to TravelPerk and test the functionality.
If everything works as expected, you just configured a simple way of getting secure access to your travel management platform.
If you’re looking to implement AWS SSO for TravelPerk or centrally manage access to multiple AWS accounts and business applications and provide users with single sign-on access to all their assigned accounts and applications from one place, get in touch with nubeGo, your trusted Cloud Technology partner:


+44 20 3901 8501


Comments